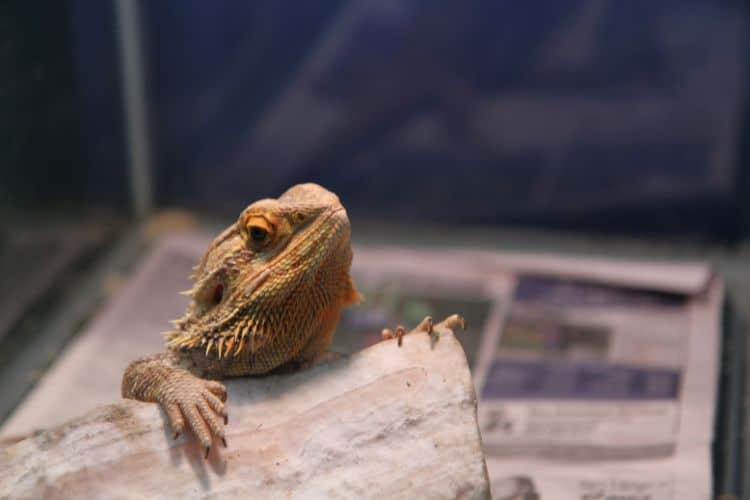
Say goodbye to dusty sand and hello to a clean, stylish paradise! If you’re tired of the mess and potential health risks associated with traditional loose substrates for your bearded dragon, then bearded dragon tile substrate is the solution you’ve been searching for.
This guide will be your roadmap to creating the perfect tile haven for your scaly friend, unlocking a world of benefits for their health, happiness, and even aesthetics.
Keep reading as we explore everything you need to know about choosing the right tiles, setting up your dragon’s dream habitat, and maintaining its pristine condition.
Benefits of Tile Substrate for Bearded Dragons
Tile substrate offers numerous benefits for bearded dragon owners, promoting their health, comfort, and well-being while creating a beautiful and easy-to-maintain environment.
Easy to Clean and Maintain
Tile is very easy to keep clean compared to loose substrates like sand or coconut fiber. Waste and debris can be quickly scooped from the tile without disruption. Tile also does not trap bacteria, odor, or molds. A simple cleaning with a reptile-safe disinfectant keeps tile floors hygienic.
Reduces Risk of Impaction
Loose substrates like sand and wood chips can be accidentally ingested, leading to impaction, a potentially fatal condition. Tile eliminates this risk as it’s impossible for your dragon to swallow it.
Won’t Harbor Bacteria or Mold
Sand and other loose substrates run the risk of harboring dangerous microbes if allowed to remain damp. Tile does not provide places for bacteria or mold to multiply since it is non-porous. Any messes on the tile can be fully disinfected. Tile floors are healthier for beardies.
Provides Solid Surface
Smooth tile allows beardies to develop proper joint and bone strength as they move around. Sand can be shifty and unstable for claws and limbs. Tile also helps wear down nails to a healthy length. The hard surface is better for muscular development.
Thermoregulation
The coolness of tile floors gives beardies a place to rest and cool down from basking. By shifting between the warm basking spot and cooler tile, they can properly regulate their temperature. Varied tile temperatures are healthy.
Variety of Tile Options
Tile comes in a huge range of types, colors, textures, and patterns. Owners can choose a natural stone look, graphic prints, eco-friendly tile, and more. Varied tile layouts provide enrichment. Grout color can also be changed.
Choosing the Right Tile for Your Bearded Dragon’s Happy Habitat
When selecting tiles, there are a few key factors to consider for the safety and comfort of your bearded dragon.
Natural stone tiles like slate and granite can provide an attractive, textured look. Ceramic or porcelain tiles are usually smoother and come in a wider variety of colors and patterns.
The texture is also important – some dragons may scratch rough surfaces, so smooth is often best. Standard 12″ tiles work well, but larger sizes are easier to clean around. Grout must be sealed and free of abrasive sand. Small grout lines should be avoided so claws don’t get stuck.
Natural Stone vs Ceramic Tile/Porcelain
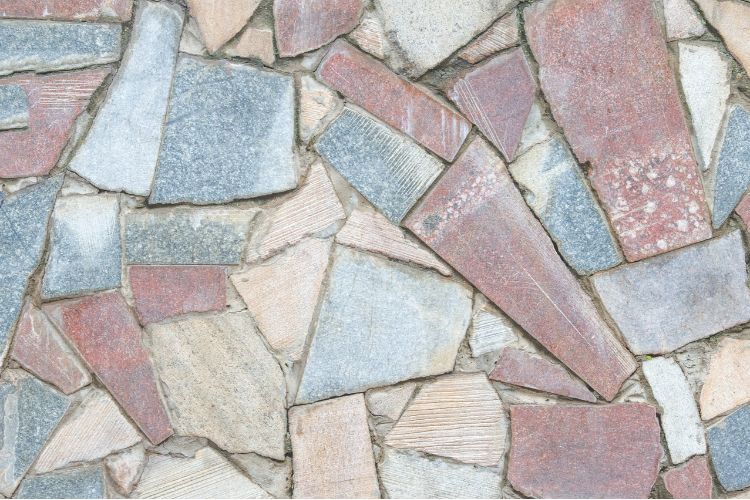
Natural stone tiles add beautiful neutral colors and naturalistic textures. Slate, granite, and sandstone are good choices. However, the surface may be rougher, especially with porous, unfinished stone.
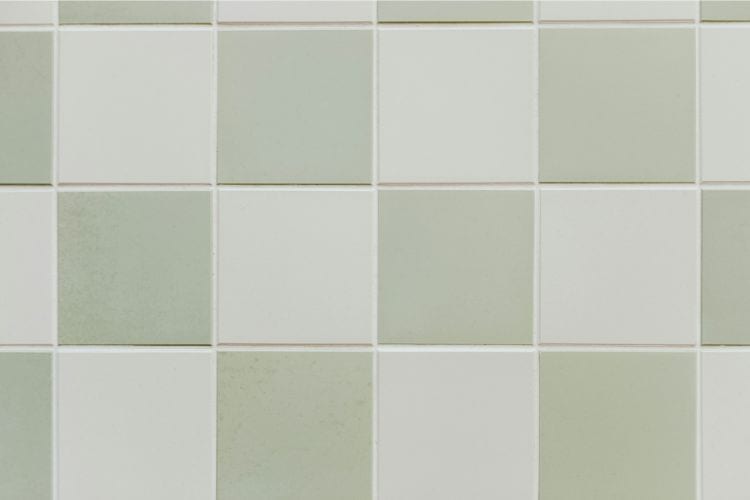
Ceramic and porcelain tiles offer brighter colors and patterns. The surface is smoother but can be slippery.
Texture Considerations
Smooth tiles allow a bearded dragon’s belly to glide easily over the surface without abrasions from rough grout or stone. But some texture provides grip – glossy tiles can be too slippery.
Size of Tiles
Standard 12” tiles are widely available. Larger 18” tiles have fewer grout lines to clean around. Small mosaic tiles should be avoided.
Grout Recommendations
Grout must be water-sealed and non-toxic. A sand-free grout prevents trapped claw injuries. Match grout color to tile.
Safety Tips
Avoid tiles with very narrow grout lines where claws could get stuck. Check for and round any sharp edges. Select non-porous tiles that don’t harbor bacteria.
Preparing the Perfect Tile Substrate for Your Bearded Dragon
Now that you’ve chosen the perfect tile, it’s time to transform it into the ideal base for your bearded dragon’s happy home. Here’s a step-by-step guide to preparing your tile substrate
Set Up the Tank and Drainage
- Purchase and assemble the main tank for the enclosure. This may involve silicone sealing the glass panels.
- Select a drainage/false bottom material such as egg crate panels, weed blocker cloth or clay hydroballs. Cut and fit this material to cover the entire tank bottom.
- This will create a raised platform for the tile and allow water to drain underneath to prevent pooling on top of the substrate.
Map Out Tile Layout
- Purchase the desired tiles for your enclosure, ensuring they are reptile-safe and non-toxic.
- Arrange the tiles on the floor of the tank without attaching them. Cut any tiles as needed to fit around decor or fixtures.
- Plan the layout so tiles fit snugly together without large gaps between them. This prevents claws and tails from getting caught between tiles.
Adhere Tiles Using Silicone or Adhesive
- Choose a non-toxic 100% silicone or tile adhesive specifically rated for use with reptiles. Avoid fume-releasing products.
- Apply a sufficient amount of adhesive to fully coat the underside of each tile and tank bottom to ensure proper bonding.
- Press each tile firmly into place on top of the adhesive. Use clamps on larger tiles to hold them for the drying time.
Fill Gaps with Grout
- Select a sand-free, non-toxic grout in a color matching the tiles. This prevents abrasive sand from hurting feet and claws.
- Press the grout firmly into joints using a grout float or squeegee. Ensure it fills gaps fully without crumbling. Smooth and level.
- Clean excess grout off tile surfaces before it dries using a damp sponge and clean water.
Seal Porous Tiles
- For natural stone tiles, apply 2-3 coats of sealant as per product instructions to waterproof the porous surface.
- Ensure the entire surface of each tile is fully coated to prevent bacteria from growing in microscopic crevices.
- Let each coat dry thoroughly before applying the next coat for maximum waterproofing.
Allow Proper Cure Time
- Let adhesives, grout, and sealants cure fully for at least 2-3 days before adding a bearded dragon.
- Keep the area well-ventilated and check for any lingering chemical odors before adding a pet.
Wash Tiles Before Use
- Once setup is complete, wash tiles thoroughly with warm water and a small amount of reptile-safe disinfectant.
- Rinse several times to remove any residues. Allow to fully dry before adding your bearded dragon.
Create the Perfect Landscape
- Arrange the tiles to create a visually appealing and stimulating environment.
- Incorporate hides, rocks, and plants to provide enrichment and basking opportunities.
- Ensure proper drainage if using a bioactive setup with a drainage layer.
Keeping Your Bearded Dragon’s Tile Paradise Clean
Maintaining a clean and hygienic environment is crucial for your bearded dragon’s health and well-being. While tile offers a significant advantage in this regard compared to loose substrates, it still requires regular cleaning and maintenance.
Daily Maintenance
- Spot clean by removing any waste, uneaten food, or debris daily. This prevents buildup.
- Use paper towels or a designated scoop to dispose of solids. Avoid using loose substrates for cleanup.
- Check for and remove shedding skin pieces which can get trapped in grout lines.
- Look for signs of damaged, loose, or missing tiles needing replacement.
Deep Cleaning
- Do a thorough deep clean every 4-6 weeks or whenever needed.
- Remove all decor and fixtures and clean separately.
- Mix a reptile-safe disinfectant per product instructions and mop or scrub tiles.
- Rinse thoroughly with clean water several times to prevent residue.
- Allow tiles to fully dry before replacing any items or beardie.
Disinfectants
- Use disinfectants specifically formulated for reptiles. Avoid harsh chemicals.
- Diluted bleach or vinegar solutions can disinfect, but make sure to thoroughly rinse afterward.
- Steam cleaners help sanitize tile floors when used properly.
Checking for Damage
- Over time, look for tiles loosening, cracking, staining, or showing excessive wear.
- Replace any damaged tiles and re-seal them if needed to keep floors safe and looking fresh.
Proper maintenance keeps tiles hygienic while deep cleaning prevents the buildup of waste, bacteria, and biofilm. Damaged tiles should be promptly replaced. Clean tile equals healthy bearded dragons!
Conclusion
By implementing the steps outlined in this comprehensive guide, you’ll not only transform your bearded dragon’s enclosure but also significantly contribute to their overall health and happiness.
When it comes to substrate options for bearded dragon tanks, tile is a top choice. Tile floors are easy to clean, eliminate bacteria buildup, and prevent potential impaction issues seen with loose substrates. With the right tile selection and setup, you can create a stylish tank habitat that keeps your bearded dragon happy and healthy.
Remember, a clean and healthy environment is the foundation for a thriving bearded dragon. Tile substrate provides the perfect platform to build this foundation, offering numerous benefits and unparalleled ease of maintenance.
Witness the difference as your dragon enjoys an improved appetite, increased activity levels, and vibrant colors within their stunning new palace. Start transforming your bearded dragon’s home today!